Hey there, Gurnee homeowners! Want to keep an eye on your front door and add peace of mind to your daily life? A video doorbell, like Ring or Nest, lets you see who’s at your door, chat with visitors, and deter package thieves—all from your phone. At HomeHero Handyman Services in Gurnee, IL, we’ve installed tons of these smart devices, and we’re excited to share our five-step guide to help you do it yourself. This project takes about 30–45 minutes (difficulty: 2/5) and uses basic tools you can find at any Gurnee hardware store. Ready to make your home safer and smarter? Let’s get started! If wiring or setup feels tricky, HomeHero’s here to help—just give us a call at (847) 555-1234 for expert installation across the Chicago suburbs.
Video doorbells are a must-have for modern home security, especially in family-friendly Gurnee neighborhoods. According to a 2023 study by SafeHome.org, homes with visible security devices like video doorbells are up to 50% less likely to be targeted by burglars. These devices let you monitor deliveries, check on visitors, and record activity, providing peace of mind whether you’re at work or on vacation. In Gurnee, where porch theft can spike during holidays, a video doorbell adds an extra layer of protection. Plus, it’s a budget-friendly upgrade, costing $100–$200 for a quality model, compared to $150–$400 for professional installation. This DIY project is perfect for beginners, adding convenience and value to your home. Whether you’re tech-savvy or just want to feel safer, this guide will help you install a video doorbell with confidence.
Tools and Materials You’ll Need Before you begin, gather these tools and materials, available at Gurnee stores like Home Depot, Best Buy, or Ace Hardware:
- Video doorbell: Choose a model compatible with your home (e.g., Ring, Nest, Arlo).
- Screwdriver (Phillips or flathead): To remove the old doorbell and mount the new one.
- Drill and masonry bit: For securing the mounting plate to brick or siding.
- Voltage tester: To confirm power is off for wired models.
- Level: To ensure the doorbell is straight.
- Wire connectors (often included): For wired installations.
- Smartphone and Wi-Fi: For setup via the doorbell’s app.
- Optional: Wire stripper for adjusting wires.
Expect to spend $100–$200 on a video doorbell, with tools likely in your toolbox. Safety tip: Turn off power at the breaker for wired installations. If you’re unsure about wiring or compatibility, HomeHero Handyman Services in Gurnee can assist. Call us at (847) 555-1234 for a seamless setup.
Step-by-Step Guide to Installing a Video Doorbell
Here’s how to install a video doorbell in five easy steps. Follow along, and your Gurnee home will be more secure in no time.
If you’re installing a wired video doorbell, safety comes first. Head to your breaker box and switch off the power to your existing doorbell circuit, usually labeled “Doorbell” or “Low Voltage.” Use a voltage tester to confirm no electricity is flowing to the doorbell wires. For battery-powered models, skip this step, as no wiring is needed. This step takes 5 minutes and is critical to avoid shocks. Safety tip: Let family members know you’re working on electrical components to prevent accidental power restoration. If you can’t locate the breaker, proceed with caution or call a professional.
If replacing an existing doorbell, use a screwdriver to remove it from the wall or doorframe. Unscrew the mounting plate and gently pull the wires out, noting their positions (take a photo for reference). For new installations or battery-powered models, choose a spot near your door at about chest height (4–5 feet) for optimal camera view. Clean the area with a damp cloth to remove dust or grime. This step takes 5–10 minutes and ensures a clean surface for your new doorbell. Tip: Label wires (e.g., “front,” “transformer”) to avoid confusion during installation.
Position the video doorbell’s mounting bracket on the wall or doorframe, using a level to ensure it’s straight. Mark screw holes with a pencil. For wood or siding, use the provided screws and a screwdriver to secure the bracket. For brick or masonry (common in Gurnee homes), drill pilot holes with a masonry bit and insert wall anchors before screwing in. This step takes 10–15 minutes and requires precision for a secure mount. Safety tip: Wear goggles when drilling into brick to protect your eyes from dust. A level bracket ensures your camera captures the right angle.
For wired models, connect the existing doorbell wires to the terminals on the new bracket, matching the photo you took (usually two wires, polarity doesn’t matter for most models). Secure with wire connectors or screws, ensuring no bare wire is exposed. For battery-powered models, insert the charged battery per the manual. Tuck wires neatly behind the bracket for a clean look. This step takes 5–10 minutes and is the trickiest part, as loose connections can cause malfunctions. Safety tip: Double-check the power is off before touching wires. If wiring looks damaged or complex, professional help is a smart choice.
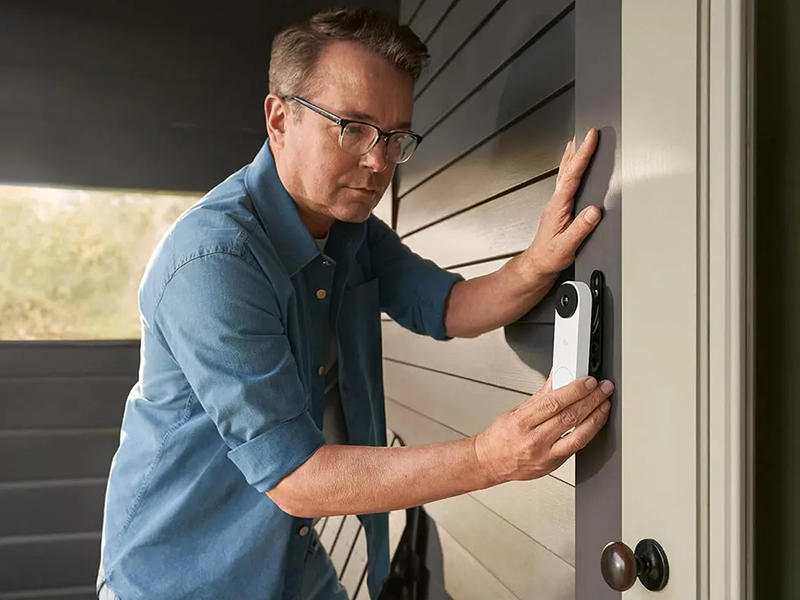
Snap or screw the video doorbell onto the mounted bracket, following the manufacturer’s instructions. Turn the power back on for wired models, and download the doorbell’s app (e.g., Ring, Nest) on your smartphone. Connect the device to your Wi-Fi, set up motion alerts, and test the camera and speaker. Adjust the angle if the mount allows. This step takes 10–15 minutes and completes your setup. Safety tip: Ensure the doorbell is securely attached to prevent theft. Enjoy your new security upgrade!
Tips for Success
- Check Compatibility: Confirm your doorbell works with your chime or Wi-Fi (check the manual or website).
- Test Wi-Fi Signal: Ensure strong Wi-Fi near your door for reliable video streaming.
- Charge Battery Fully: For battery models, charge before installation to avoid interruptions.
- Difficulty Rating: We rate this project a 2/5—simple but requires care with wiring or drilling. Hardwired setups or older homes may increase complexity.
Safety Tips
- Turn off power at the breaker for wired installations to avoid electrical shocks.
- Use a voltage tester to confirm no electricity is flowing.
- Work in a dry, well-lit area to avoid slips or errors.
- If you’re unsure about wiring or drilling into masonry, consult a professional.
When to Call a Professional
Installing a video doorbell is a quick DIY project, but older Gurnee homes with outdated wiring or complex chime systems can complicate things. Improper installation can damage the device or your home’s electrical system. That’s where HomeHero Handyman Services shines. Our licensed, insured team in Gurnee, IL, handles video doorbell installations with precision, ensuring perfect functionality. From smart home upgrades to drywall repairs, we make your projects stress-free. Call us at (847) 555-1234 for fast, friendly service across the Chicago suburbs.
Gurnee’s safe, family-friendly neighborhoods benefit from smart upgrades like video doorbells, which deter theft and provide peace of mind. This project pairs well with other smart home improvements, like smart thermostats or lighting, to enhance convenience and security. Regular maintenance, such as checking door hardware or updating locks, keeps your home safe year-round. Visit our HomeHero blog for more tips on making your Gurnee home smarter, from painting to deck prep.
Installing a video doorbell is a simple way to boost your Gurnee home’s security and convenience. With 30–45 minutes, a few tools, and our five-step guide, you can set it up like a pro. Prefer to skip the wiring? HomeHero Handyman Services is here to help. Our Gurnee-based crew loves tackling smart home projects and more, from TV mounting to deck refinishing. Let us handle your to-do list with care and a smile. Reach out at (847) 555-1234 for a free quote, and let’s make your home safer today!