Upgrade Your Gurnee Home with a Smart Thermostat
Hey there, Gurnee homeowners! Want to cut your energy bills and make your home more comfortable? Installing a smart thermostat is a game-changer. These nifty devices let you control your home’s temperature from your phone, optimize heating and cooling, and save money—especially during Gurnee’s chilly winters and humid summers. At HomeHero Handyman Services in Gurnee, IL, we’ve installed tons of smart thermostats, and we’re excited to share our five-step guide to help you do it yourself. This project takes about 45–60 minutes (difficulty: 3/5) and uses basic tools you can find at any local hardware store. Ready to make your home smarter and more efficient? Let’s dive in! If wiring or setup feels daunting, HomeHero’s here to help—just give us a call at (847) 555-1234 for expert installation.
Hey there, Gurnee homeowners! Want to cut your energy bills and make your home more comfortable? Installing a smart thermostat is a game-changer. These nifty devices let you control your home’s temperature from your phone, optimize heating and cooling, and save money—especially during Gurnee’s chilly winters and humid summers. At HomeHero Handyman Services in Gurnee, IL, we’ve installed tons of smart thermostats, and we’re excited to share our five-step guide to help you do it yourself. This project takes about 45–60 minutes (difficulty: 3/5) and uses basic tools you can find at any local hardware store. Ready to make your home smarter and more efficient? Let’s dive in! If wiring or setup feels daunting, HomeHero’s here to help—just give us a call at (847) 555-1234 for expert installation.
Why a Smart Thermostat Matters
Smart thermostats, like Nest or Ecobee, can save you 10–15% on energy bills, according to Energy Star, by learning your schedule and adjusting temperatures automatically. In Gurnee, where winters can dip below freezing and summers get steamy, a smart thermostat keeps your home cozy while reducing energy waste. For example, you can lower the heat when you’re at work or crank up the AC before you get home—all from an app. Plus, many models offer energy usage reports, helping you track savings. This DIY project not only boosts your home’s efficiency but also adds modern appeal, which is great for resale value. Whether you’re tech-savvy or just want lower bills, this guide will walk you through installing a smart thermostat with confidence. Let’s get started!
Smart thermostats, like Nest or Ecobee, can save you 10–15% on energy bills, according to Energy Star, by learning your schedule and adjusting temperatures automatically. In Gurnee, where winters can dip below freezing and summers get steamy, a smart thermostat keeps your home cozy while reducing energy waste. For example, you can lower the heat when you’re at work or crank up the AC before you get home—all from an app. Plus, many models offer energy usage reports, helping you track savings. This DIY project not only boosts your home’s efficiency but also adds modern appeal, which is great for resale value. Whether you’re tech-savvy or just want lower bills, this guide will walk you through installing a smart thermostat with confidence. Let’s get started!
Tools and Materials You’ll Need Before you begin, gather these tools and materials, available at Gurnee stores like Home Depot, Menards, or Ace Hardware:
- Smart thermostat: Choose a model compatible with your HVAC system (e.g., Nest, Ecobee).
- Screwdriver (Phillips or flathead): To remove the old thermostat and mount the new one.
- Voltage tester: To confirm power is off.
- Drill and small bits: For securing the mounting plate if needed.
- Level: To ensure the thermostat is straight.
- Wire labels (often included with the thermostat): To mark wires during removal.
- Clean cloth: To wipe the wall or device.
- Optional: Wire stripper for adjusting wire ends.
Expect to spend $100–$250 on a smart thermostat, with tools likely already in your toolbox. Safety tip: Always turn off power at the breaker before working with wires. If you’re unsure about compatibility or tools, HomeHero Handyman Services in Gurnee can handle it. Call us at (847) 555-1234 for a smooth setup.
Step-by-Step Guide to Installing a Smart Thermostat
Here’s how to install a smart thermostat in five straightforward steps. Follow along, and you’ll be controlling your home’s temperature like a pro in no time.
Step 1: Turn Off Power to Your HVAC System
Safety first! Head to your breaker box and switch off the power to your heating and cooling system to avoid electrical shocks. In Gurnee homes, the breaker is usually labeled “HVAC” or “Furnace.” Use a voltage tester to confirm the power is off by touching the thermostat wires—no reading means it’s safe. This step takes 5 minutes and is critical to prevent accidents. Safety tip: Double-check the breaker is off, and let family members know you’re working on electrical components to avoid surprises.
Safety first! Head to your breaker box and switch off the power to your heating and cooling system to avoid electrical shocks. In Gurnee homes, the breaker is usually labeled “HVAC” or “Furnace.” Use a voltage tester to confirm the power is off by touching the thermostat wires—no reading means it’s safe. This step takes 5 minutes and is critical to prevent accidents. Safety tip: Double-check the breaker is off, and let family members know you’re working on electrical components to avoid surprises.
Step 2: Remove the Old Thermostat
Carefully remove the old thermostat’s faceplate, which may snap off or be held by a small screw (use a screwdriver if needed). Take a photo of the wiring setup for reference—this will save you headaches later. Label each wire (e.g., R, W, Y, G) using the stickers provided with your new thermostat. Unscrew the base from the wall, gently pulling the wires through. This step takes 10–15 minutes. Keep screws in a small bowl to avoid losing them. If the old thermostat is stuck or wires look damaged, proceed cautiously to avoid wall damage.
Carefully remove the old thermostat’s faceplate, which may snap off or be held by a small screw (use a screwdriver if needed). Take a photo of the wiring setup for reference—this will save you headaches later. Label each wire (e.g., R, W, Y, G) using the stickers provided with your new thermostat. Unscrew the base from the wall, gently pulling the wires through. This step takes 10–15 minutes. Keep screws in a small bowl to avoid losing them. If the old thermostat is stuck or wires look damaged, proceed cautiously to avoid wall damage.
Step 3: Mount the New Thermostat Base
Check your smart thermostat’s compatibility with your HVAC system (most include a guide or online checker). Position the new mounting plate on the wall, using a level to ensure it’s straight. Mark screw holes with a pencil, and use a drill to secure the plate if the old holes don’t align. Thread the labeled wires through the base. This step, about 10–15 minutes, requires precision to keep the thermostat level and secure. Safety tip: Avoid overtightening screws, as this can crack the mounting plate or drywall.
Check your smart thermostat’s compatibility with your HVAC system (most include a guide or online checker). Position the new mounting plate on the wall, using a level to ensure it’s straight. Mark screw holes with a pencil, and use a drill to secure the plate if the old holes don’t align. Thread the labeled wires through the base. This step, about 10–15 minutes, requires precision to keep the thermostat level and secure. Safety tip: Avoid overtightening screws, as this can crack the mounting plate or drywall.
Step 4: Connect the Wires
Match each labeled wire to the corresponding terminal on the new thermostat base (e.g., R to R, W to W). Most smart thermostats have clear labels or a wiring diagram in the manual. Gently push wires into the terminals and tighten screws with a screwdriver to secure them. If wires are too short, use a wire stripper to expose more copper, but don’t cut them. This step takes 10–15 minutes and is the trickiest part, as incorrect wiring can prevent the thermostat from working. Double-check connections against your photo. If you’re unsure, don’t guess—professional help ensures a safe setup.
Match each labeled wire to the corresponding terminal on the new thermostat base (e.g., R to R, W to W). Most smart thermostats have clear labels or a wiring diagram in the manual. Gently push wires into the terminals and tighten screws with a screwdriver to secure them. If wires are too short, use a wire stripper to expose more copper, but don’t cut them. This step takes 10–15 minutes and is the trickiest part, as incorrect wiring can prevent the thermostat from working. Double-check connections against your photo. If you’re unsure, don’t guess—professional help ensures a safe setup.
Step 5: Attach and Set Up the Thermostat
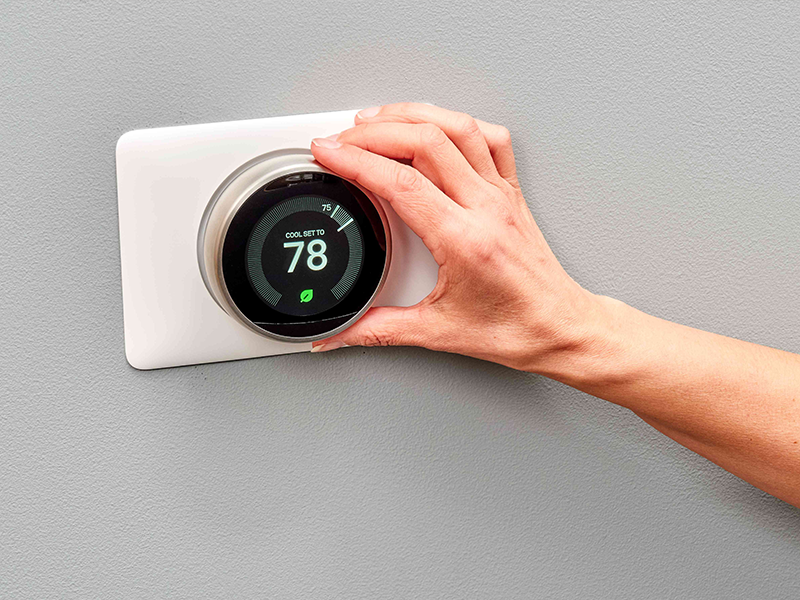
Snap or screw the thermostat onto the mounted base, following the manufacturer’s instructions. Turn the power back on at the breaker, and follow the thermostat’s app or on-screen prompts to connect it to your Wi-Fi and set preferences (e.g., temperature schedules). Test the heating and cooling to ensure it responds correctly. This final step takes 10–15 minutes and completes your upgrade. Safety tip: If the system doesn’t respond, turn off power and recheck wiring. Enjoy your energy-saving, smart home upgrade!
Snap or screw the thermostat onto the mounted base, following the manufacturer’s instructions. Turn the power back on at the breaker, and follow the thermostat’s app or on-screen prompts to connect it to your Wi-Fi and set preferences (e.g., temperature schedules). Test the heating and cooling to ensure it responds correctly. This final step takes 10–15 minutes and completes your upgrade. Safety tip: If the system doesn’t respond, turn off power and recheck wiring. Enjoy your energy-saving, smart home upgrade!
Tips for Success
- Check Compatibility: Confirm your HVAC system (e.g., gas, electric, heat pump) works with the thermostat before buying.
- Take Photos: Document the wiring setup to avoid confusion during installation.
- Follow the App: Most smart thermostats have user-friendly apps to guide setup.
- Difficulty Rating: We rate this project a 3/5—manageable but requires attention to wiring details. Complex systems or older homes may increase difficulty.
Safety Tips
- Always turn off power at the breaker before touching wires to avoid shocks.
- Use a voltage tester to confirm no electricity is flowing.
- Work in a well-lit area to see wire labels clearly.
- If you’re unsure about wiring or your HVAC system, consult a professional to prevent damage.
When To Call A Professional
Installing a smart thermostat is a rewarding DIY project, but older homes in Gurnee or complex HVAC systems (e.g., multi-zone setups) can complicate things. Incorrect wiring can damage the thermostat or your system, leading to costly repairs. That’s where HomeHero Handyman Services shines. Our licensed, insured team in Gurnee, IL, handles smart thermostat installations with precision, ensuring perfect functionality. From smart home upgrades to plumbing fixes, we make your home projects stress-free. Call us at (847) 555-1234 for fast, friendly service across the Chicago suburbs.
Installing a smart thermostat is a rewarding DIY project, but older homes in Gurnee or complex HVAC systems (e.g., multi-zone setups) can complicate things. Incorrect wiring can damage the thermostat or your system, leading to costly repairs. That’s where HomeHero Handyman Services shines. Our licensed, insured team in Gurnee, IL, handles smart thermostat installations with precision, ensuring perfect functionality. From smart home upgrades to plumbing fixes, we make your home projects stress-free. Call us at (847) 555-1234 for fast, friendly service across the Chicago suburbs.
Why Smart Home Upgrades Matter in Gurnee
Gurnee’s climate, with cold winters and warm summers, makes energy efficiency a priority for homeowners. A smart thermostat optimizes your HVAC system, reducing energy use and keeping your home comfortable year-round. This project is part of a broader trend toward smart home upgrades, like video doorbells or smart lighting, which add convenience and value. Regular maintenance, such as checking air filters or sealing windows, complements these upgrades for maximum savings. Check our HomeHero blog for more tips on making your Gurnee home smarter and more efficient.
Gurnee’s climate, with cold winters and warm summers, makes energy efficiency a priority for homeowners. A smart thermostat optimizes your HVAC system, reducing energy use and keeping your home comfortable year-round. This project is part of a broader trend toward smart home upgrades, like video doorbells or smart lighting, which add convenience and value. Regular maintenance, such as checking air filters or sealing windows, complements these upgrades for maximum savings. Check our HomeHero blog for more tips on making your Gurnee home smarter and more efficient.
Conclusion: Enjoy a Smarter, More Efficient Home
Installing a smart thermostat is a simple way to boost your Gurnee home’s comfort and cut energy costs. With about an hour, a few tools, and our five-step guide, you can upgrade your HVAC system like a pro. Prefer to skip the wiring? HomeHero Handyman Services is here to help. Our Gurnee-based crew loves tackling smart home projects and more, from drywall repairs to deck refinishing. Let us handle your to-do list with care and a smile. Reach out at (847) 555-1234 for a free quote, and let’s make your home smarter today!
Installing a smart thermostat is a simple way to boost your Gurnee home’s comfort and cut energy costs. With about an hour, a few tools, and our five-step guide, you can upgrade your HVAC system like a pro. Prefer to skip the wiring? HomeHero Handyman Services is here to help. Our Gurnee-based crew loves tackling smart home projects and more, from drywall repairs to deck refinishing. Let us handle your to-do list with care and a smile. Reach out at (847) 555-1234 for a free quote, and let’s make your home smarter today!